Helping Your Child Use Their MacBook
There are several issues that come up for students for which they might need parental assistance at home. Two of the main issues students run into are managing and backing up the files on their computer.
Back Up Files
There are two locations to which we direct students to back up the files on their computer: Google Drive and/or a flash drive.
Google Drive
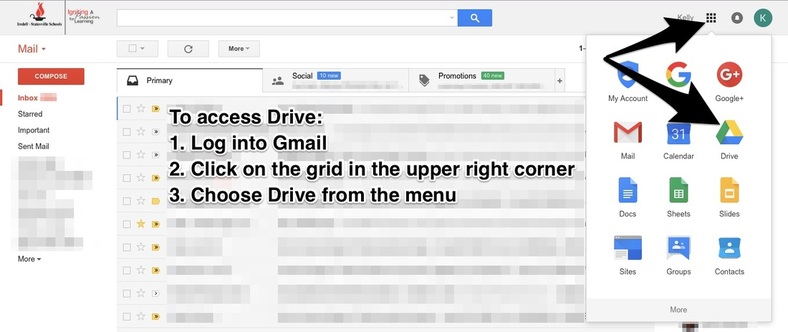
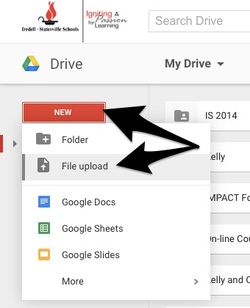
To add files to Google Drive, click the New button on the left side of the screen.
Then choose File Upload from the drop down that appears.
This will allow you to choose the files you want to upload into Google Drive. You can upload any file type into Google Drive including audio and video files. While these files may not be viewable in Google Drive they can be stored in Drive and downloaded.
Because Iredell Statesville Schools has Google Apps for Education each student has an unlimited amount of storage space in their Google Drive.
Flash Drive
To use a flash drive, simply plug it into either of the computer's usb ports.
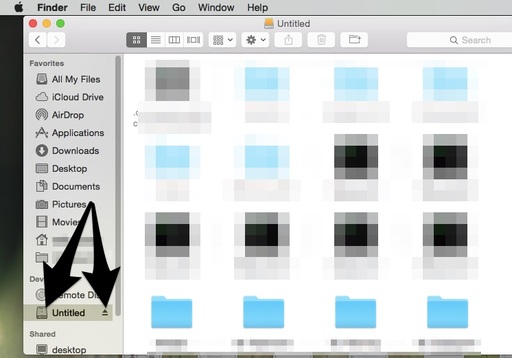
The flash drive can be found by clicking to open Finder.
Note: Finder is the blue face icon which is always at the far left side of the dock at the bottom of the computer screen.
The flash drive will be listed under the devices heading. To add files to the flash drive simply drag the files onto the name of the flash drive in the left side menu.
To eject the flash drive, click once on the eject button at the immediate right of the drive's name.
Delete/Organize Files
Desktop Files
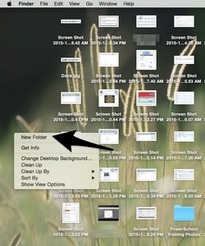
To organize files on the desktop into a folder, you can create a folder by right clicking on the trackpad and choosing New Folder from the drop down menu.
Note: The right click is usually clicking or tapping on the trackpad with two fingers. Many students have customized their trackpad so that the right click is a different gesture.
It is best not to keep any files on the desktop as this slows the computers reboot process.
Once the files are in a folder, you can easily drag the folder into Finder so that it is not saved on the desktop.
Files in Finder
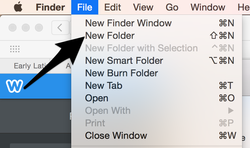
Inside Finder you can create a new folder by clicking on File and choosing New Folder from the drop down menu.
Once your new folder is created you can drag files into the folder.
Once your new folder is created you can drag files into the folder.
Deleting Files

To delete files off the computer you drag the file onto the Trash icon at the far right side of the dock.
You want to be sure that you click the Empty button on the Trash to fully delete files and thus create space on the hard drive. (Shown in the image below)
You want to be sure that you click the Empty button on the Trash to fully delete files and thus create space on the hard drive. (Shown in the image below)